Showing posts with label #jewelrydesigner. Show all posts

Thursday, 21 August 2014

THROW BACK THURSDAY

Morning....

So i have one more exam to tackle and this semester is a wrap and welcome hustle mode again :) i promise you i love to hustle, i am that girl that will get dirty (hands dirty) and most times even if it doesn't pay well, if its fun i am hands on.


Took this pictures last year with my best friend ( as usual) outside our hostel in campus.


BOW TIE RING

BOW TIE HEAD BAND

WOODEN BANGLE


Thank you for stopping by

:)

HAPPY THURSDAY

XOXO

Ms. Shee

Thursday, 24 July 2014

10 JEWELRY MAKING ESSENTIALS

Hey Loves...

Today's post will help us understand more about hand made jewelry, i will try answer you question on the materials needed to start your own jewelry business.
here is a list of what you will need.
1. CHAINED NOSE PLIERS.

I use it to also cut wires in case you cant get a wire cutter. but are generally to hold your beads, wire as well as bending the wire and working your way with the jump rings


2.ROUND NOSE PLIERS.

main duty is to create loops with your wires.


3. WIRE CUTTING PLIERS.

Just like the name suggests, you will need it to cut your wires.


4. SCISSORS.

This to help especially where strands are involves, most beads are packed in strands or the paper bags.

5. BEADS

below are a variety of some you could start with.


SEED BEADS


6. WIRES.

below are different sort of wires you can start with
A. BALLED HEAD PINS (for earrings)

 
B. HEAD PINS (earrings)

 
C. EYE PIN

 
E. just wire :) best used when making bangles :))


F. Colored wire, this are rare but if you can access some, they make really pretty items and their thickness (gauge) comes in diffrent colors. the most available ones are made out of Steel and brass and are quit affordable.


6. STRANDS/ BANDS.

Used to make necklaces as well as bangles. this also come in different gauge (width) and some are elastic. See here for a sample of a D.I.Y on an Elastic Bangle.


7.  CLASPS.

To complete your necklace or bangles. there so many options and will mostly be made of steel, brass and copper.


8. EARRING HOOKS.

Steel and brass hooks are the most available ones. You will need them in making your earrings.


9. JUMP RINGS.

They are used to join loops especially when making earrings and a loop holding the beads needs to be connected with your earring hook. See here for a D.I.Y on making an earring.


10. CHAINS.

They are in varied designs and sizes. Used to make earrings, necklaces and bangles.
See here for some of the necklaces i have made using chains to help you get it more.


I hope that was useful, keep sending me your questions as well as what you would like me to expound more on. It was my pleasure.

Photo credit: Google Search

Keep in touch :)

XOXO

Ms. Shee Art
Instagram : @shee_art / @ms.shee_art
Facebook: SheeArt

Saturday, 21 June 2014

JEWELRY OF THE DAY

Hae, 
This post was suppost to be up yesterday but my net jammed, sorry :(

If you reading this know you make my life worth more, because i love blogging lotsa :)


This earrings are my all day eer day kinda piece.


Bangle in my fav' color :)
Silver ring is gifted, *puresilverfyi :P 


My fav necklace (silver) that i always incorporate (layer) with my beaded necklaces, am a pendant and long necklace kinda babe :)


THANK YOU FOR STOPPING BY

TAG ME YOUR JEWELRY LOOK OF THE DAY ON INSTAGRAM FOR FEATURES 
(@Shee_Art)


XOXO

Ms. SHEE

Tuesday, 17 June 2014

SIMPLIEST EARRING TUTORIAL

Hae...

I have been off fof a while but hey, better late than never, so i thought i should do this DIY because i love jewelries and i blog about them and an earring is the eassiest piece to make.

WHAT YOU WILL NEED

1. beads (you can use old jewellry)

2. Nose pliers (Ksh. 200)

3. Cutting pliers (Ksh. 200)

4. Wire (for beginners the one shown below are best, Ksh. 50 - a packet)

5. Earring hooks (Ksh. 50 - a packet)


PROCEDURE...

1. Inset the wire onto the bead(s) and using cutting pliers cut excess of the wire leaving a centimeter.


Something like this...


2. Using a round nose pliers, 'coil' the wire as shown below...


Tha


3. Before closing the wire onto the end, insert one of the earring hook as shown below... Then close!!


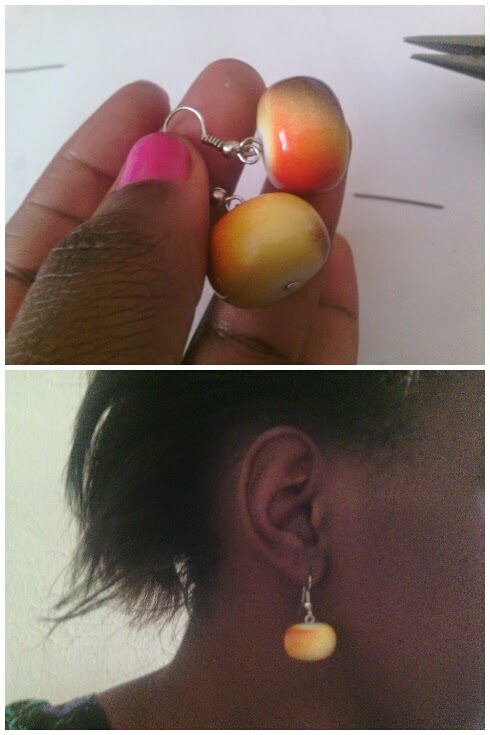
......and there you go...


I really hope you learnt from this, i would appreciate your feedback.

Check out my instagram page @Shee_art and Facebook page (Shee Art) for more earrings and if you want a DIY on any of them let me know :)


Thank you for stopping by ;)

XOXO 

Ms. Shee